Run the agent from an HTTP webhook
What for: an external store system can start the agent with a plain HTTP POST.
Problems it solves: warehouse or CRM events arrive neither from Telegram nor on a schedule — you need a protected URL with a secret.
Result: a webhook with secret, header, IP filter, and mapping is saved.
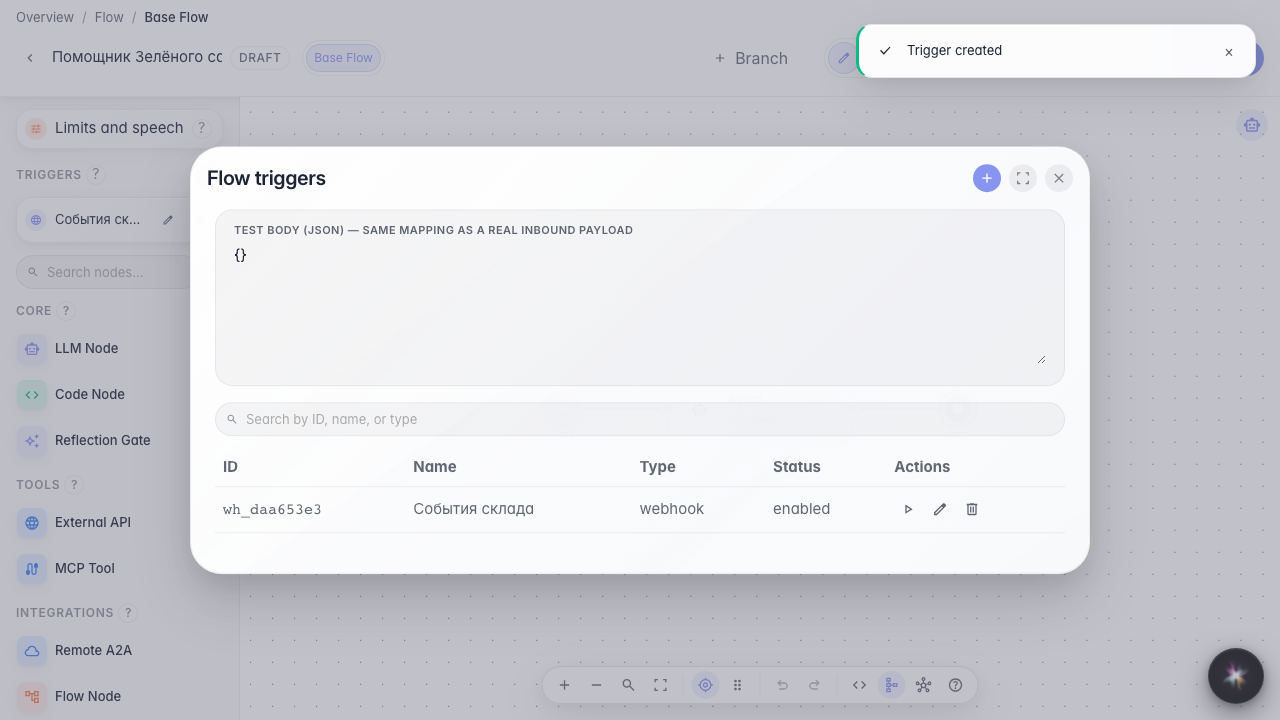
Step 1. Open the triggers list
In the editor menu choose Triggers. Create a webhook here alongside schedule and Telegram.

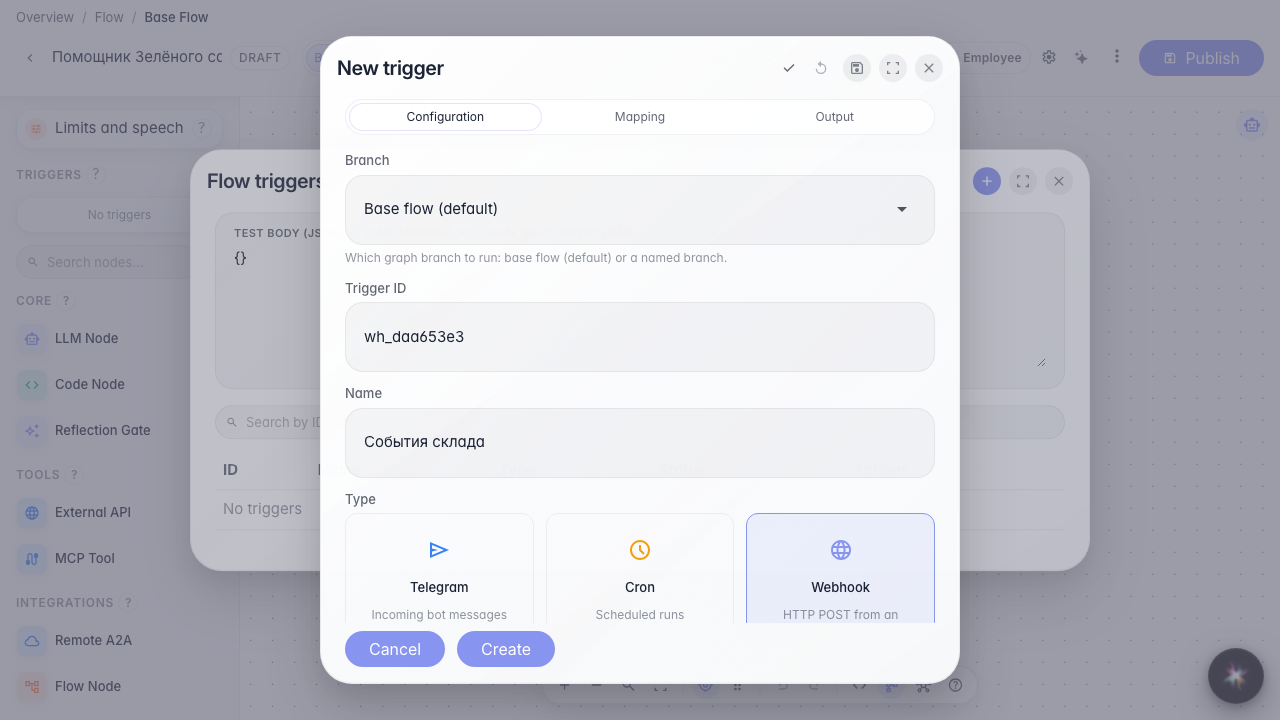
Step 2. Choose Webhook and set the name
Webhook accepts JSON over HTTP POST (not an A2A chat). Set an id and the name Warehouse events. The endpoint URL appears below — copy it into the external system.

Step 3. Configure secret, header, and allowed IPs
The secret is the request password — without it the platform rejects the call. Secret header (here Authorization) is the HTTP header name that carries that password. Allowed IPs are address tags; empty means no filter. Ready curl can be copied for a smoke test.
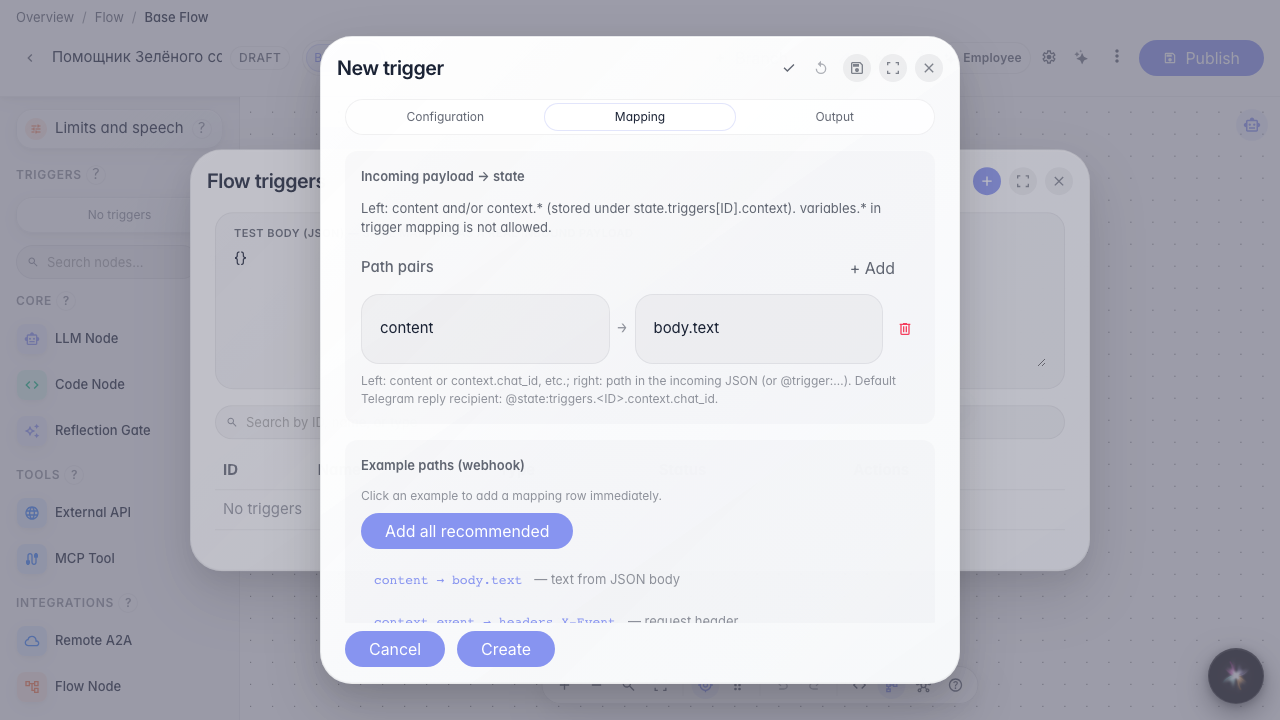
Step 4. Add mapping from an example
On the Mapping tab click an example — for example content ← body.text. That turns warehouse JSON text into the agent input. Sample payload shows the expected shape.
Step 5. Save the webhook and find it in the list
Result demonstration. Warehouse events appears in the list — an external system can call the agent on a protected URL.
Summary. You can configure a webhook: URL, secret, header, IPs, and mapping.